As you might have seen on my Twitter/Instagram/Blog, I've been counting down the days until I left for Mexico (less than 24 hours after finishing my undergrad career!). So right now I'm probably sleeping off a margarita-induced hangover in 85 degree weather. #notsorry I didn't want to leave you all hanging for a week so I've asked some of my bloggy friends to entertain you while I'm gone.
Let's give a warm Blogland welcome to my good friend Sara - The Queen of Nail Polish! No, but really. Sara is such a pro. She even painted her nails different every single day for 21 days. She's basically my nail painting idol and she's also really good at life advice....and beer suggestions! Enjoy this awesome tutorial that I'll definitely be trying as soon as I get home.
XO - Monny
Hello, all! While Monica is off gallivanting in Mexico and being much, much warmer than me, she asked if I would be interested in writing a guest post for her. Um -- yes!
So, hi there! I'm Sara and I blog over at Sara Magdalena - creative title, huh? As my tag line says, I blog about nails, craft beer, and everything in between. I love craft beer so much that I was asked to write for a national web site dedicated to it - American Craft Beer (you can find links to my articles here) - and I go on at least two beercations (vacations dedicated to craft beer) a year.
However, today's guest post is brought to you by my other love: nail polish. When Monica asked me to post for her, I asked if she had anything she wanted me to post about specifically. Monica knows and understands my nail polish crazy (I did a 31 Day Challenge this year - yeah, painted my nails for 31 days straight), so she suggested a holiday nail art tutorial.
After going through my Instagram account from this time last year, I decided to pester Monica even more and make her choose the nail art I create for you all today.. and she chose what I've dubbed Mr. Tiniest Tree!
This is my first real nail art tutorial, so please bear with me! I've included some info that maybe nail polish crazies like me would find to be obvious, but maybe isn't necessarily so for folks that just dabble.
Mr. Tiniest Tree Nail Art Tutorial
Things you will need: base coat, base nail polish color, scotch tape, scissors, striping tape (optional if you have it, similar here), tree nail polish color, and a top coat. Other optional items include loose glitter, rhinestones, studs, or nail polish colors to dot on mini ornaments.

First, start with clean nails. As in, if you've filed or cut your nails, put on a cuticle oil or lotion, etc, it is best to make sure any residue is gone before starting.
Once your nails are clean, add a coat of base coat. I've tried many kinds, but I'm currently testing out Duri Rejuvacote, and really like it (this is what my nail idol, Chalkboard Nails, uses). Any clear coat should work, though.
Let the base coat dry.
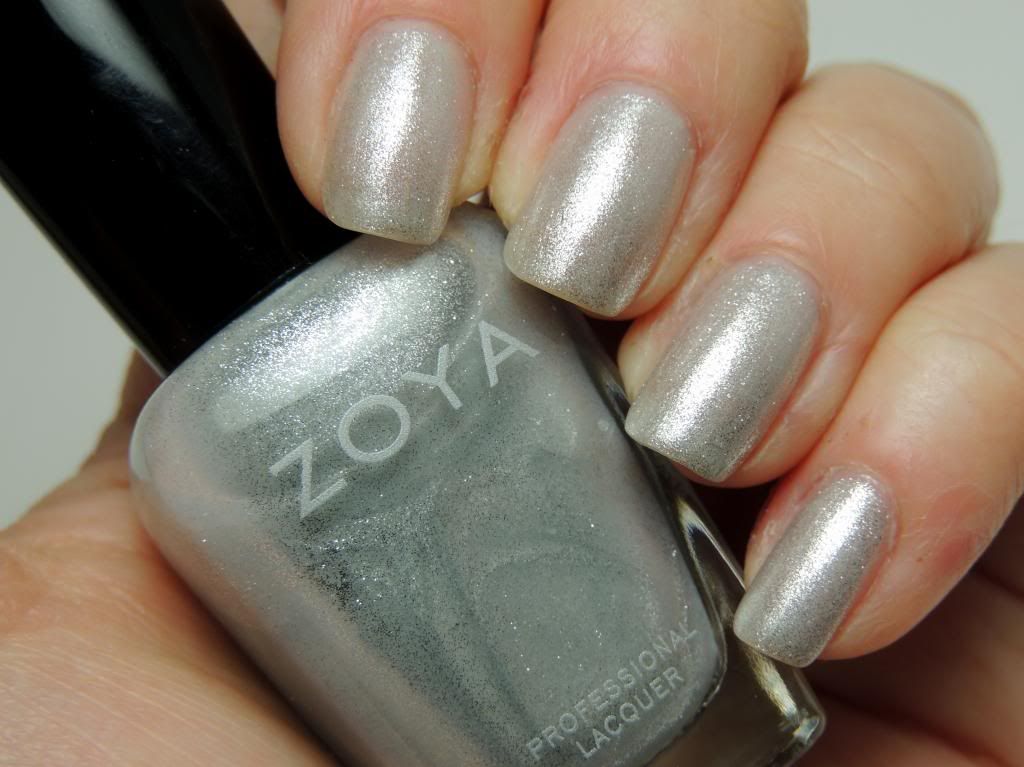
Choose a base color for your nail art. Last year I used Revlon Metallic, but this year I have a more subtle silver shade, Zoya Seraphina from their 2013 Zenith Winter Collection. I used three coats. You may use whichever base color you would like, though I would recommend an opaque color that contrasts with the color of tree that you choose.
Here is Zoya Seraphina on its own - I love how subtle it is!
This is important! Before continuing on to the next steps, your base color polish MUST be dry! I am impatient, so I use a quick dry top coat and wait about 10-15 minutes. But I must stress: your nail polish must be completely dry before proceeding.
Now I have a little quick little photo collage for the next steps. I will give you more details below the collage.

Place your scotch tape in the shape of a triangle on your dried base color. TIP: before placing the scotch tape, put the tape on your skin and pull it off a few times - this will leave the tape sticky, but not too sticky to rip off your existing nail polish.
Next, start adding your striping tape or small strips of scotch tape in a zig zag pattern across the exposed part of your nail.
Make sure to push down and make sure there are no bubbles or strange creases preventing your scotch or striping tap from being flat on your nails. If they aren't flat on your nails, then you may get nail polish underneath them and your tree won't come out looking as nice.
Once your tape is flat, add your tree color. I chose Zoya Ray, a nice a dark green from the winter collection last year. You can choose a green or any other contrasting color to your base, but one suggestion I have is that this polish is relatively opaque, as you do not want to add more than one coat of polish during this step.
I polished Zoya Ray on pretty thick, but not too thick, so you could still see the striping tape through the polish.
Wait about 30 seconds and maybe blow on your nails a little to speed along the drying process of your tree color. It is important that the tree color is a little dry, otherwise the polish will run together once you pull the tape off. However, if it is too dry, then you could pull up too much polish when you remove the tape.

Next, you want to slowly and carefully pull off your tape. It is very important to to in the reverse order of how you placed on your tape. Since the piece of tape closest to the base of the tree (the tip of my nail) was the last piece I placed, that is the first piece that I remove. You'll end by taking off the first piece of scotch tape that you placed on your nail.
Ta-da! Mr. Tiniest Tree!
You can definitely leave the tree like this, or you can add embellishments, which I personally love to do!

To add loose glitter, studs, or rhinestones, I use a dab of clear polish and a toothpick. Dip the toothpick in the clear polish, use that to grab the loose glitter, dab a little more clear polish, and then place the glitter on your tree. Repeat at desired, wait a couple of minutes for them to dry a little, and finally, add your top coat (my favorite top coat is Cult Nails Wicked Fast).
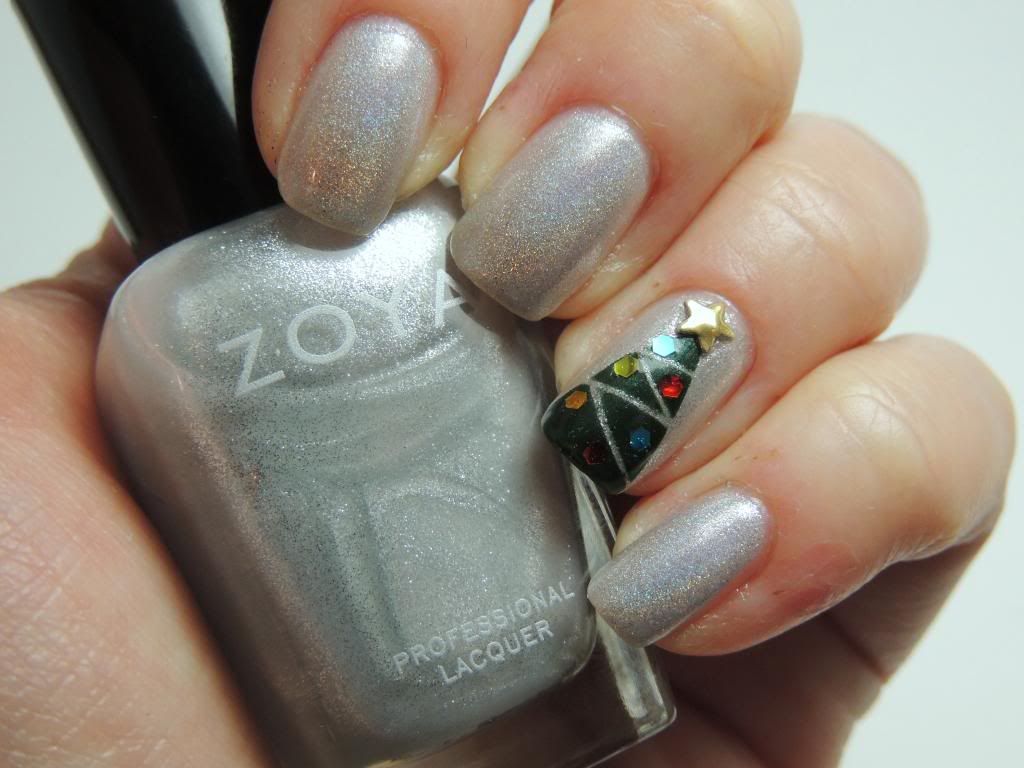
Here is my final mani look with Mr. Tiniest Tree. I decided that I wanted to make my plain nails stand out a bit more, so I added two very thin coats of a holographic top coat called Holo Blast by Colores de Carol.
On my other hand, I tried out different combinations of how to make Mr. Tiniest Tree. Sorry the picture turned out kinda bad - getting a good shot of the various glitter was pretty tough! On the pinkie and ring, I used a lighter green (Colores de Carol Arbolito), and the ring and middle fingers have the thicker striping tape (the green one in the top pictures). Also hard to tell, but I just used gold loose glitter and a gold rhinestone on the index finger - it looked pretty classy!

There you have it! I know it looks like a lot, but this is actually pretty simple to do! (I'm just pretty consistently long on words!)
Thanks so much for reading! And thanks to Monica for asking me to be here today - I know I had lots of fun working on this post for you all! :D
If you have any questions, leave them in the comments below, and I'll get back to you! If you're interested in following me on my blog or social media, here are some links for you! (No pressure, just trying to be user-friendly!)


So cute!!!
ReplyDeleteThanks! :D
DeleteLatest Best Michael Kors bags here
ReplyDeletehttp://www.graysonmichaelkors.com/